I recently took my first steps on the exciting path of web development in Drupal. One of the first challenges I faced was setting up a development environment for my internship. Like every beginner, I had many attempts and errors, but thanks to the help of my colleagues I managed to successfully complete this first step, which inspired me to share my experience through this article.
In this article we will see step by step how to set up a development environment using docker4drupal. The necessary requirements of Drupal 8 will be described below, which will be met with the installation of docker4drupal.
Web Server: Nginx, Apache, Internet Information Server or any that supports PHP 7
Database engine: MYSQL 5.5.3 or equivalent such as Mariadb 5.5.20 or Percona 5.5.8 in these versions or higher
PHP Language: Version 7.1 in 64 Bits with the following extensions
- PDO
- XML
- GD o Imagemagick
- Openssl
- Json
- Curl
- Mbstring
More information can be consulted in the Drupal 8 system requirements
To set up a local development environment you can choose one of the following options:
- Install these components separately and configure them.
- Installing default packages such as Wamp Server for Windows, Mamp Server for Mac or Xampp for Windows, Mac or Linux are all very good options, however they are designed for general purposes, which indicates that after installation it will be necessary to make some additional configurations for them to work correctly for Drupal 8.
- Implement docker4drupal or similar like Docksal which are designed specifically for Drupal, using containers optimized for development.
A little more about Docker and Docker4Drupal...
Working with Docker in development environments allows us to save a lot of time in environment deployments and make better use of our hardware resources.
Docker4Drupal is a set of Drupal-optimized docker images that allow you to have a development environment ready for deployment in a matter of minutes.
It is an open source project available for free download and use from the Docker4Drupal repository on Github . The environment is built with the instructions defined in the docker-compose.yml file which are interpreted by docker-compose.
Requirements to run Docker4Drupal
First you need to download Docker-compose .
- Sistema Operativo Linux (recomendado), MacOS o Windows Pro 10 64 Bits, Enterprise o Education.
- Docker
Complete instructions on how to take advantage of these environments can be found in the official documentation on local environments with Docker4Drupal.
As of the date of writing this document, the latest version of docker4drupal is 5.1.1, it is recommended that you check the latest version of Docker4Drupal .
Drupal 8 download
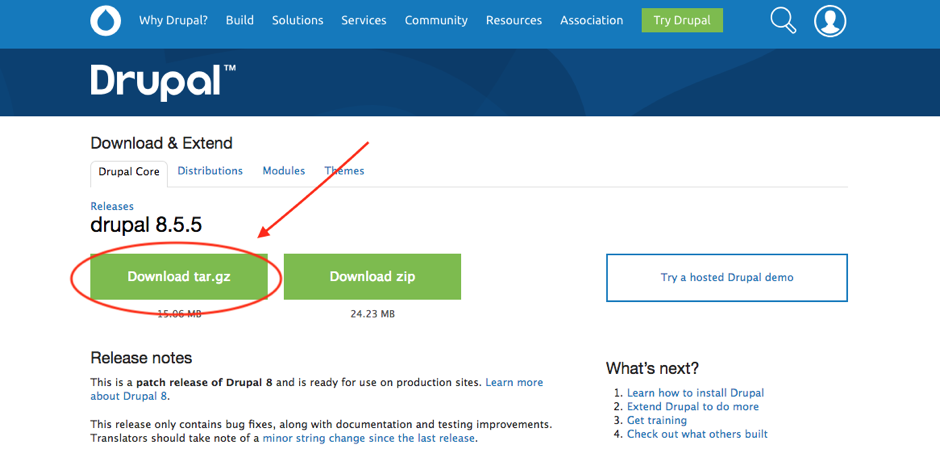
Our next step is to download the latest stable version of Drupal 8 .
At this time we will download version 8.5.5, since it is the last one published at the time of writing this article
Install an environment with Docker4Drupal
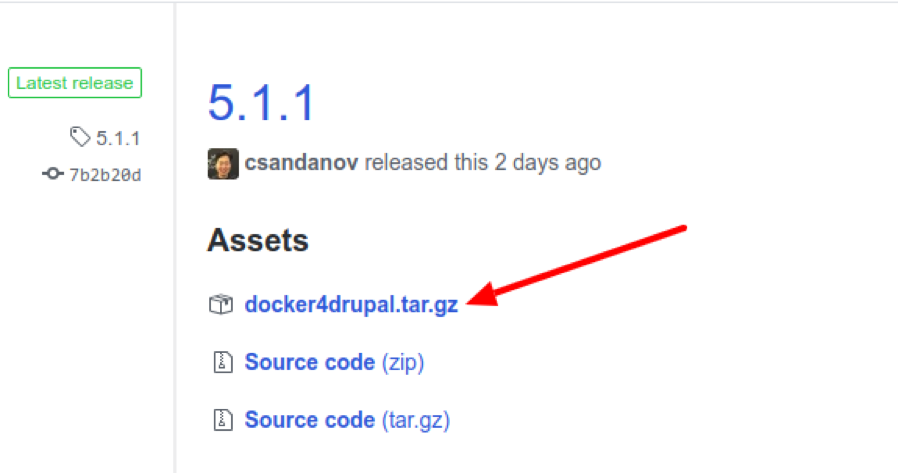
Next what you need to do is download the docker4drupal.tar.gz file , as shown in the following image:
When you unzip the docker4drupal file, you will have the following files:

- docker-compose.yml : is the file with the environment building instructions
- docker-sync.yml : very important to use in MacOs environments, it is used in conjunction with docker-compose.yml
- .env : it is the file where the versions and other variables of the images to be used are defined in the docker-compose.yml file, if you cannot see it it may be that the operating system is hiding it, for that you will have to configure it to show hidden files
- Makefile : Contains commands to facilitate container management, more information about the commands can be found in Drupal Stack Documentation.
- traefik.yml : Traefik is an HTTP balancer proxy used by docker4drupal as a front-end of the stack. In case you want to work in the multi-environment model you will need this file to do the redirection, in a standard model you will not need it.
-
Environment configuration and deployment
- In the location where you want to store your project you must create a folder giving it the name you prefer, in this case we wanted to call it drupal project , notice how it has been created inside a folder called docker, which in turn is inside another called workspace , as we mentioned above, can be in any directory, whichever you prefer.

- Locate the unzipped docker4drupal files inside the folder you created.

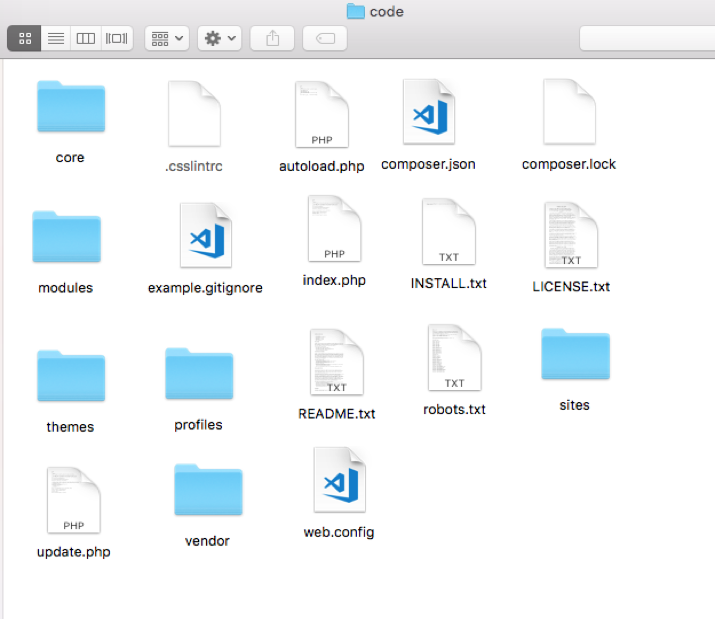
- If you have the code in a repository, clone the source code into a folder called code inside the new directory, using your preferred version control tool, for example git, if on the other hand you have the code inside a folder, just copy it to the project folder and rename it to code, we wanted the folder to be called code to standardize the name, not because it is mandatory to be called that way, when you have mastered the environment configuration you can rename it as you prefer.

- The folder should contain the source code of the site, that is, upon entering you should see the following:
- In the drupalproject folder, create a folder called mariadb-init and inside it place the SQL database backup. It is important that the file has the .sql extension, this will be automatically imported when starting the containers, a mariadb container script will take care of that.
-
Configuring the docker-compose.yml file
- Open the docker-compose.yml file in your preferred editor and uncomment the lines of the volume definition for the mariadb service and additional to the ./mariadb volume (lines 13 and 14 of the file we are using in this example) , which should look like this:
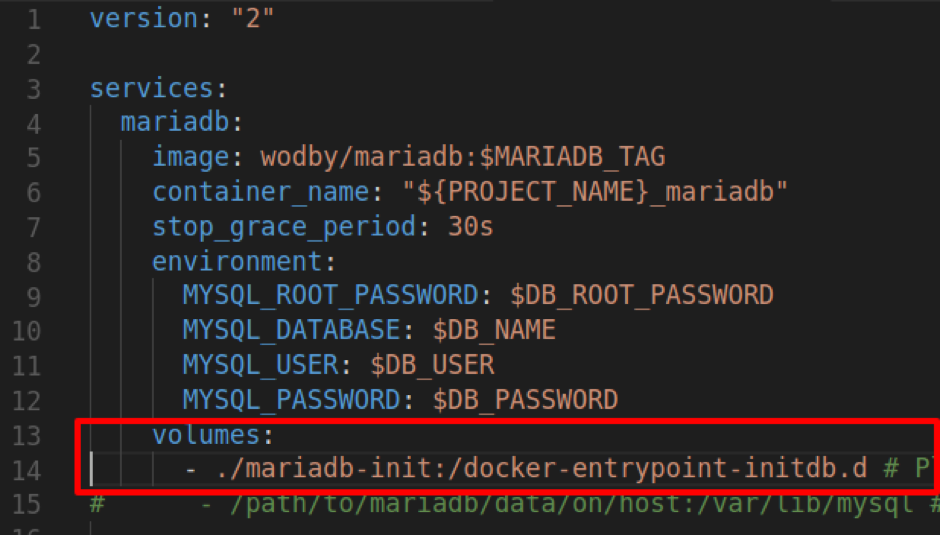
- By doing this we are telling docker that we want to mount our mariadb-init folder inside the mariadb container as a folder located at /docker-entrypoint-initdb.d, when you first start the container, a script inside it will search for the files .sql and will import them into a database called drupal.
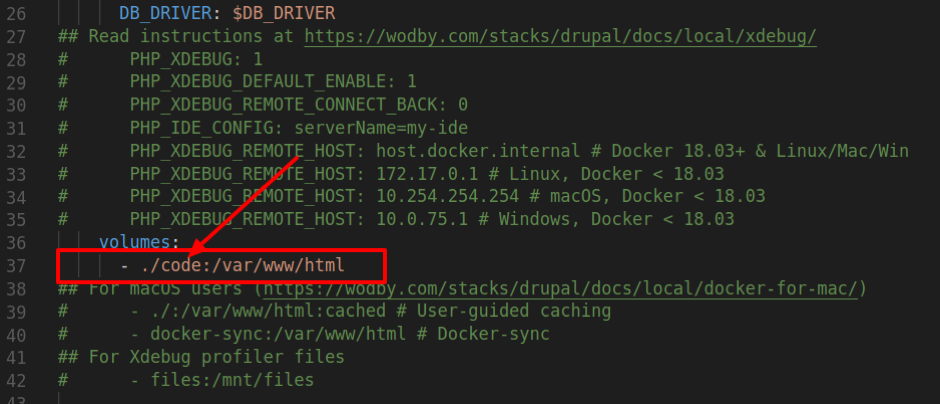
- In the PHP service we must indicate that the site code is located within the code folder , this definition is made in the container volume which is originally defined as the assembly of the current folder using ./ but as in our case the code is in the code folder, then we must change it to ./code , look at the following image about the change made. This line basically indicates that our code folder is going to be mounted in the container as /var/www/html.
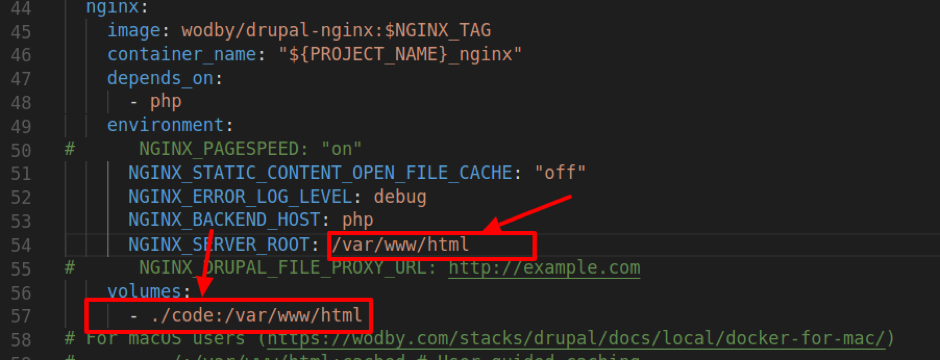
- We do the same for the definition of the NGINX container and additionally we change the publication path since by default it expects that within our folder we have a folder called web, which is where the Drupal index.php file would be, this is not the case of our project Since it was not mounted in that structure, in our case index.php is located in the root of the code folder, which is why /web must be removed in the root definition. Look at the following image about the changes made.
Configuring the .env file
- Open the .env file in your editor of choice
- Edit the PROJECT_NAME value with the name of your project, any name you like, it doesn't have to be the same name as the folder, in lowercase, without spaces and without special characters, in this case we will call it drupalproject . Additionally you can change the DB_NAME, DB_USER, DB_PASSWORD and DB_ROOT_PASSWORD values to your preference, but it is not mandatory.

Setting database connection parameters and file folder
- Inside the code/web/sites/default folder make a copy of the default.settings.php file and rename that copy to settings.php.

Note: if you are going to work in a local environment you must create a settings.local.php file with the following script in the settings.php file
if (file_exists($app_root . '/' . $site_path . '/settings.local.php')) {
include $app_root . '/' . $site_path . '/settings.local.php';
}
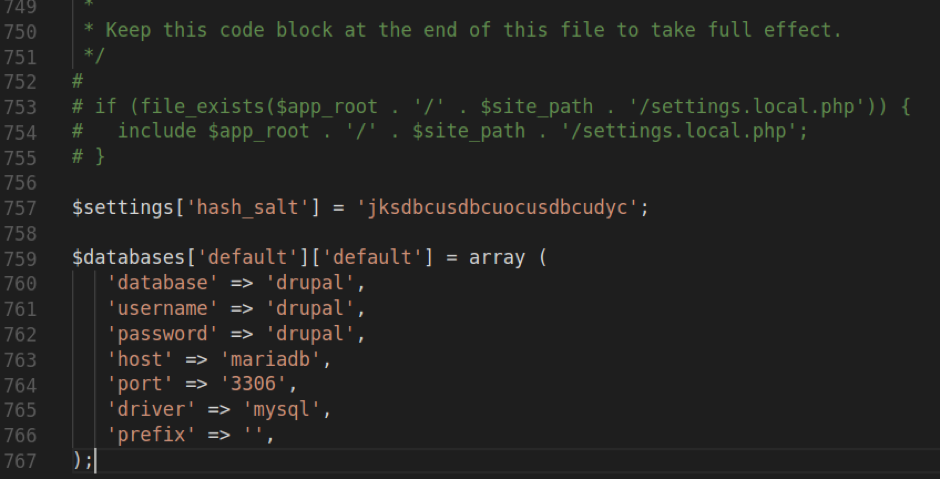
Open the settings.php file with your favorite editor and at the end add the following code:
$settings['hash_salt'] = 'jksdbcusdbcuocusdbcudyc';
$databases['default']['default'] = array (
'database' => 'drupal',
'username' => 'drupal',
'password' => 'drupal',
'host' => 'mariadb',
'port' => '3306',
'driver' => 'mysql',
'prefix' => '',
);
The above adds a random string called “hash_salt” which will be used to generate random values and encrypt the communication, the following is the connection arrangement to the database, note that the data is the one defined in the .env file, like this If you changed the default ones, be sure to change them here as well.
You should now have your settings.php file like the image below:
Now create the code/sites/default/files folder which is where drupal will upload the public files and assign write permissions to it.

Since it is a development environment, you can assign write permissions to all users, implementing permission 777 from the console, or the equivalent in your operating system. It is very important that you do this so that Drupal can write its temporary files to the folder. files.
$ sudo chmod -R 777 files
Important: Use the 777 permission only in a local environment and machine under your control to avoid security issues.
Running the environment
Make sure the docker service is started.
Now, to run the environment and have docker download, configure and deploy the environments, run the following command using the console and located in the project folder, that is, where the docker-compose.yml file you configured is.
$ docker-compose up -d
Once the command is executed you will be able to see how the container images are downloaded.

To check the status of the containers you can use the following command:
$ docker ps
Once finished you should see confirmation of the creation of the containers.
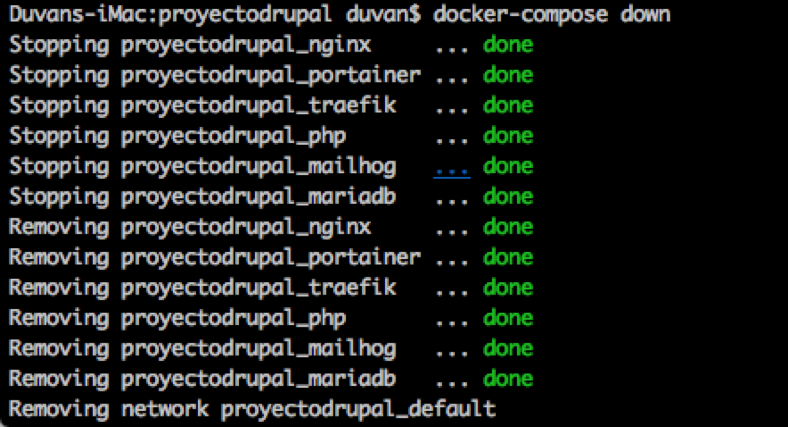
Environment review and final configuration
Once you have waited for the database to load, you can visit the site at the following URL
http://drupal.docker.localhost:8000/
If you open this URL and you see the following message:
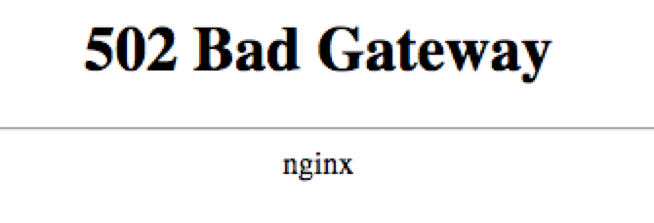
Most likely, you have not finished loading all the containers yet, if so, wait a moment and reload the page.
Once the containers have finished loading, we'll start configuring Drupal:
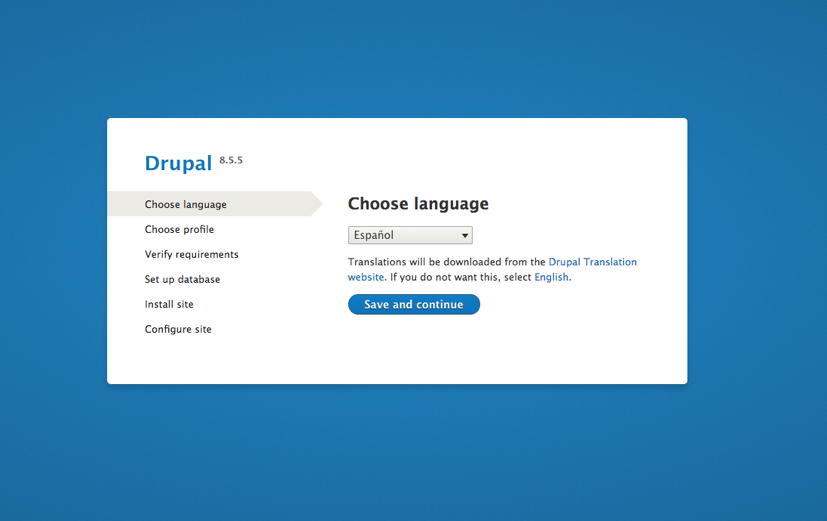
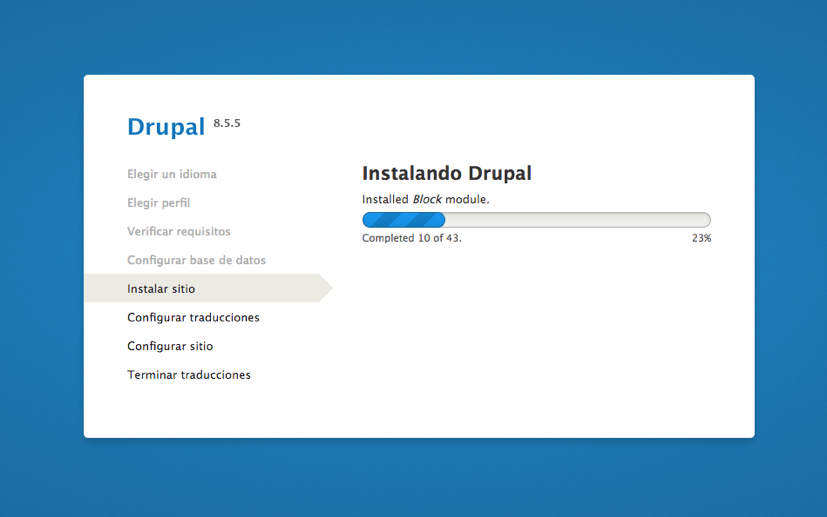
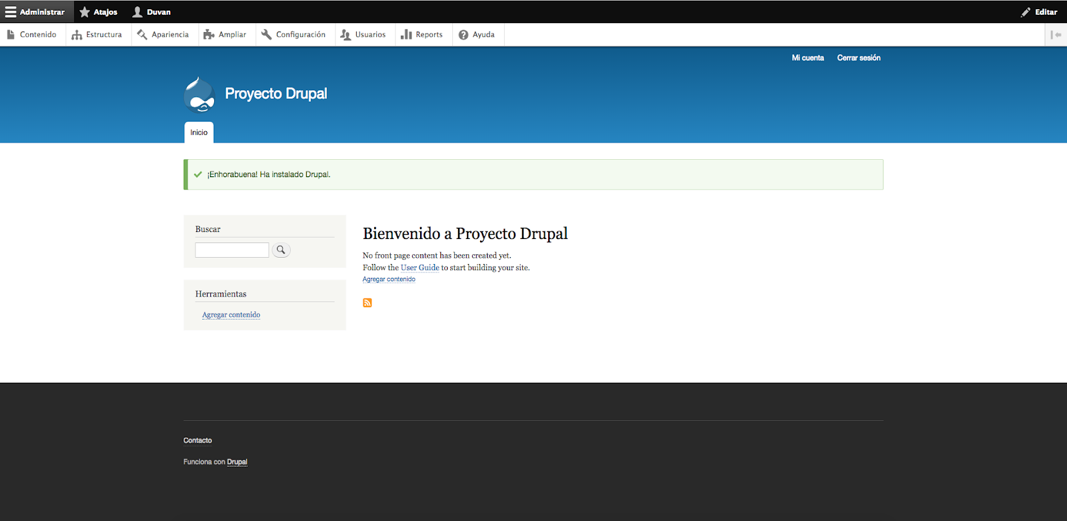
Once the Drupal installation and configuration is complete, we will see something similar to this:
In conclusion:
Working with docker4drupal helps us a lot in many aspects such as environment deployments, use of hardware resources, etc.
Also, being an open source project gives us the following advantages:
- • Free use
- • Early fault detection
- • Docker images optimized for Drupal
This benefits us because we can make better use of our time, resources and options.
