
Percona XtraDB Cluster Installation
Continuing with the series, we have already prepared our machines for the installation of Percona, so we are going to install in all of the latest versions from the Percona web site https://www.percona.com/downloads/percona-release/redhat/

We start the service.

We configure the service to start with the machine.

We assign a password to the root.

Stop the service.

Moving the data to another partition
We are going to change the location of the path of the data to put it in another partition, this as a preventive measure in case we are running out of space in the future so we can do it without affecting the operating system partition.
We move the current folder of the data to the new folder, which in this case will be in /home/mysql-data.

We adjust its permissions.

We re-create the previous folder and adjust its permissions since we will let the .sock file remain there.

We edit the mysql configuration file to indicate the new path.


It should look something like this:
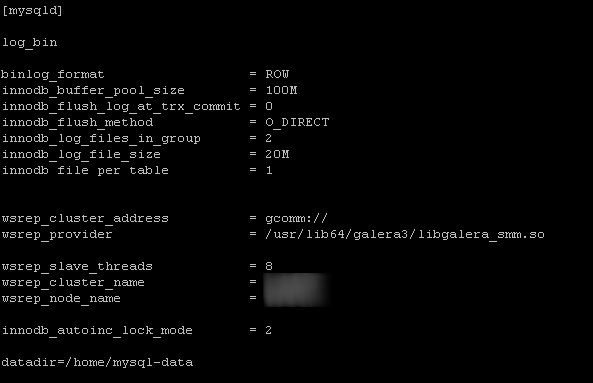
To check if everything is OK, we restart the service.

If you want to read the first and third part of this article here are the links:
https://www.seedem.co/en/drupal-experts-blog/installing-percona-cluster-redhat-7-part-i
https://www.seedem.co/en/drupal-experts-blog/installing-percona-cluster-redhat-7-part-iii