Load Balancer Configuration and Usage.
Creating a database and user for the portal in Drupal.
We enter one of the nodes with the root user.

And we execute the following group of SQL statements (Making sure to change the database name to the one you prefer and using a much more secure password).

Load balancing, check script
When installing Percona DB we have available a script called clustercheck located in /usr/bin/clustercheck this script will help us to give a status to HAProxy on our node.
According to the instructions of the script which you can see by opening the file /usr/bin/clustercheck we must create a user in the database.
Log in to one of the nodes as root and run the following SQL statement (Change the password to a more secure one).

To test if everything is ok, we can run the following command.

If we return something like the following, then it will be fine.

We are going to configure the service in xinetd on each of the database nodes by editing the file.

We need to pass the user and password as parameters in the command, as follows

It should look something like this
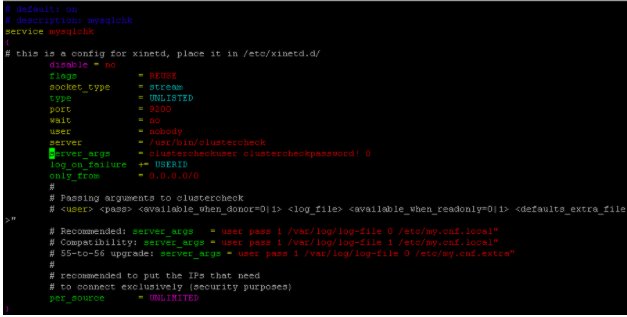
Now we add it to the list of services

We are going to replace the service located on port 9200 so that it is used by the script, comment out the existing one and add ours

We install, start the xinetd service and enable it to start with the startup of the machine

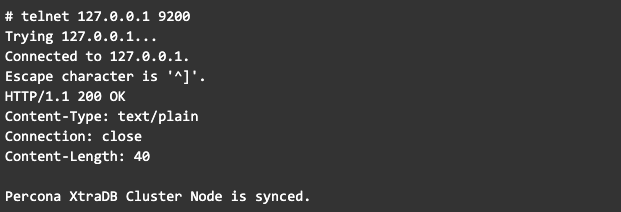
To test if everything is ok, you can make a call to port 9200 to the IP, locally and from the server that will query it

Installing HAProxy on a server
We are going to install HAProxy on the server that has been designated for this purpose.


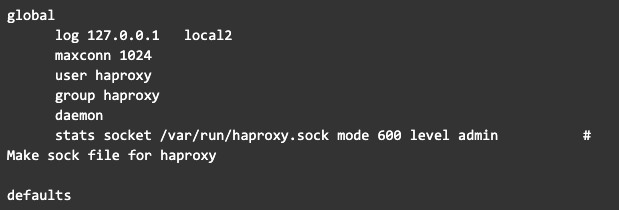
Let's define the configuration for the logs for haproxy.


We are going to create a new configuration file so let's rename the existing one.

Now we will create the new configuration file.

We add this content to the file (Note that at the end a user and password are defined that has been set in portal:portal, we recommend changing it).
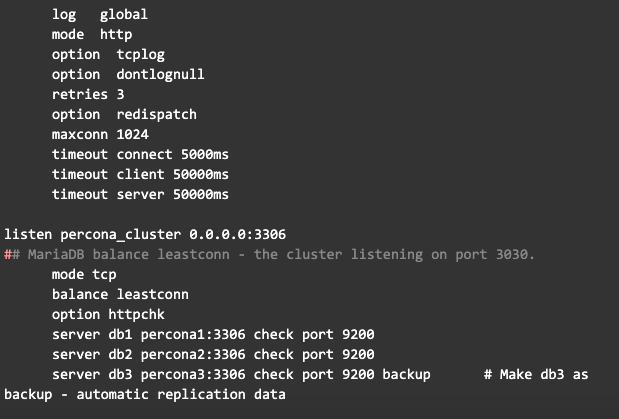

From the previous configuration, you can see that we have left the db3 server as a backup, meaning that requests will only reach it if one of the other two servers is not working, thus reducing any blocking problems due to there being many servers.
You may also notice the following:
- The listening port for the node balancer is 3306
- The listening port to see the statistics is 80.
We start the service

Now we can test the service by trying to connect directly to the balancer server by its IP address, if the connection is good then our configuration has been successful.

Accessing HAProxy statistics
To access the statistics generated by HAProxy, navigate to the load balancer server URL which in my case is http://172.18.1.8/stats. When you enter it will ask you for a username and password which was previously configured, use that data.
- User: portal
- Password: portal
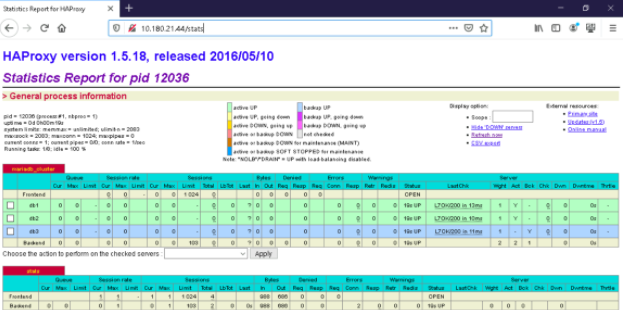
Upon entering you will see something like the following (Note that this version of HAProxy is already unmaintained, consider using a more recent version).
Use in Drupal server
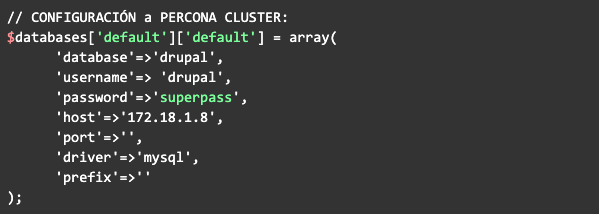
In Drupal's database settings you can set it like this:
Common activities
Reboot
If it is required to restart the service by shutting down all the nodes, it is important that you make sure you shut down the nodes one by one and when you start them you turn them on from the last shutdown to the first.

If the startup fails it is probably not the last one that was retired, check the file /home/mysql-data/gvwstate.dat this contains the last server seen, start by booting that server.
Endnotes
I hope that this series of articles has been helpful in implementing your own database Cluster model and although the implementation carried out may be improved, the objective is to share the knowledge that we acquire in our daily lives.
If you want to read the first, second and third parts of this article, we leave you the links here:
https://www.seedem.co/blog/percona-cluster-installation-on-redhat-7-part-i
https://www.seedem.co/es/blog/instalacion-de-percona-cluster-en-redhat-7-parte-ii
https://www.seedem.co/es/blog/instalacion-de-percona-cluster-en-redhat-7-parte-iii
