Drupal has a multitude of contributed modules that provide very flexible and robust functionality. Precisely 3 of these modules are the ones mentioned, with which we can build administrative or end-user interfaces in a simple, scalable way and, most importantly, using the “Drupal methodology”.
A practical example (which we will discuss below) involves creating an interface where an administrator user would select or filter which users they want to add to a group. The example presented here is not definitive. Naturally there can be many other ways and improvements, but for our purpose, it works as a sample of what we can achieve without having to write too much code. The concept is similar to the following:
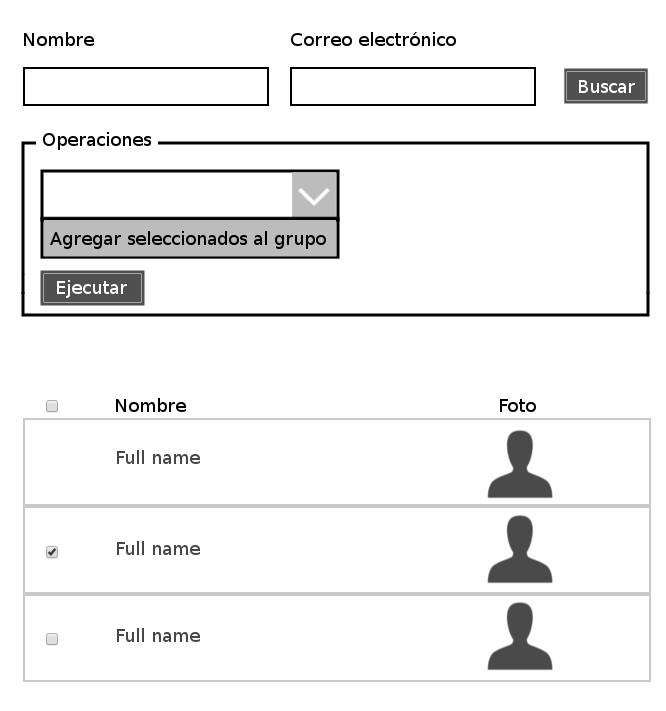
We will take into account the following:
- Naturally, we need the Views , Views Bulk Operations and Rules modules . They must be installed previously.
- The previous interface will act on the URL group/%group/user/add . Take into account the argument (or those we need) in the URL. We can create this URL using a View, a Panels page or any other way
PROCEDURE:
1. Go to admin/config/workflow/rules/components and create a new component of type “Action Set”. In our case, the parameters are shown below:
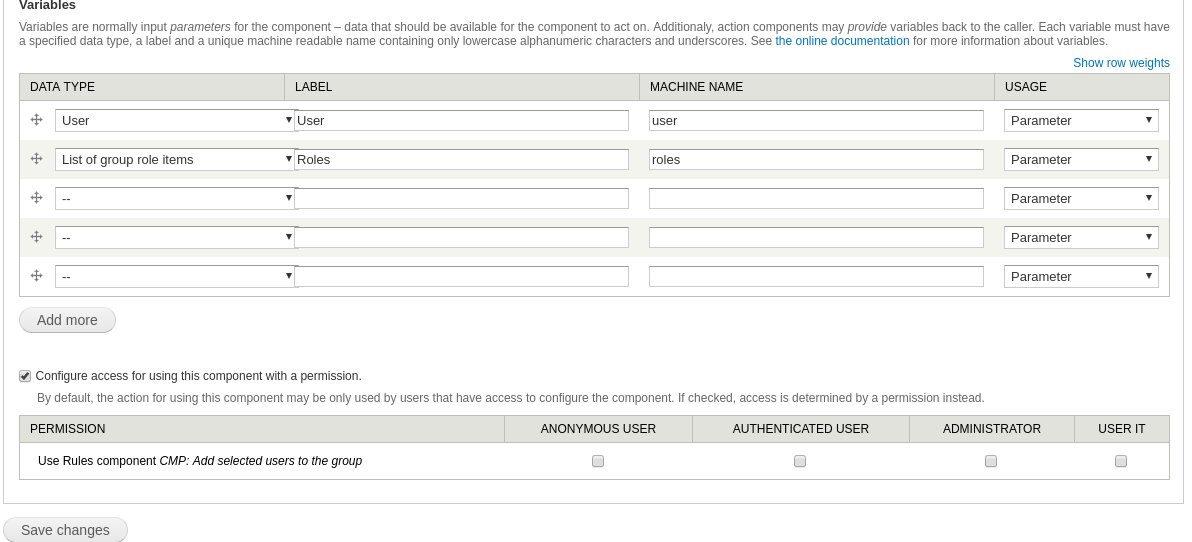
IMPORTANT NOTE: The permissions option must be checked, otherwise an error will be displayed at the time of execution.
2. As this is an Action set, we can only add conditions. This type of component must be used, since it is the one integrated with Views Bulk Operations (VBO from now on). If we need conditions, it is possible to use the Conditional Rules module, but in our case, it is not necessary, so the component looks as follows:

In the previous image, you can see as follows:
-
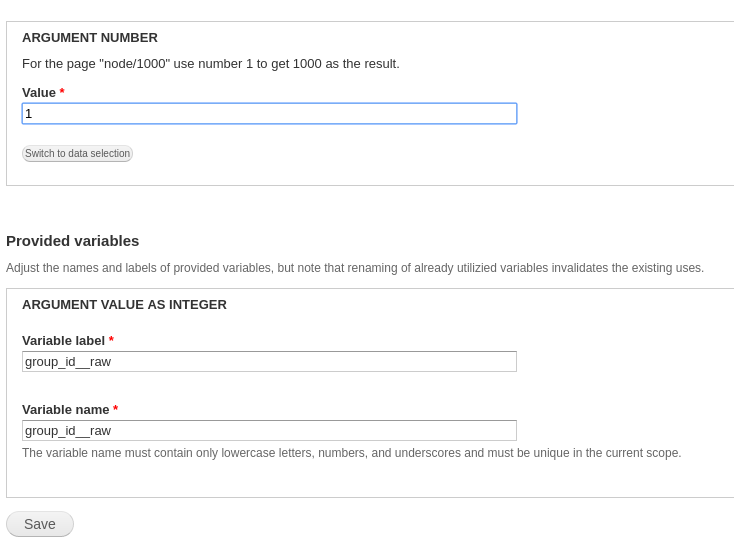
There is an action “Get integer argument from URL”: This action is provided by the Rules Data Transforms module. It allows to obtain a value from the URL where the component will be executed. As the View will be in the URL group/%group/user/add, we indicate the position of the argument. Keep in mind that the first (group) would be “0”, the second (%group) would be 1 and so on. In this case, it would be 1:
- The second action “Fetch entity by ID” allows to obtain an entity given its type and ID. It is from the Rules module, so we will not explain what it is. What we must know is that the entity (in this case the group) is necessary, since when working with references the object must be passed (in Rules).
- The third action is nothing more than a call to another component. In our example, it is a component that performs the functions of adding the group as such. It is highly recommended to make use of components, since the same set of actions can be reused in different rules, in different scopes as long as the parameters are respected. Returning to the example, it looks like this:
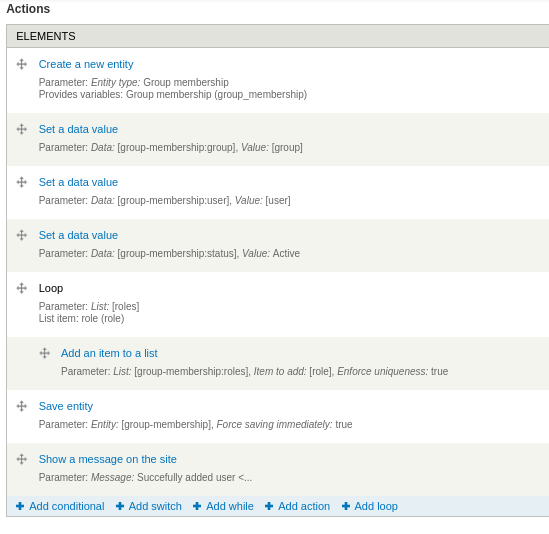
And this is the parameter configuration of such an “embedded” component:

3. Once the component is created, we create a View (a block in this case). We add the desired fields, as well as the exposed filters. Do not forget that in the case of the blocks, the use of AJAX must be enabled, otherwise, we will not see the filters:
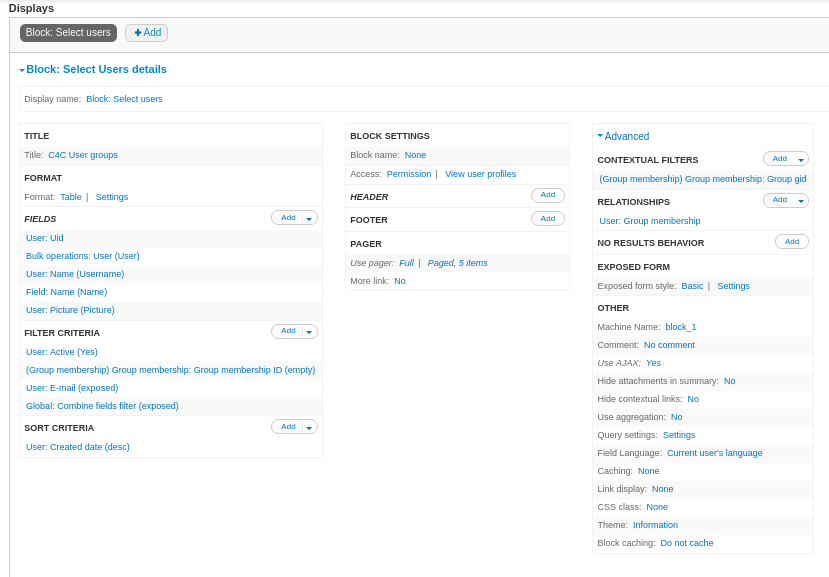
4. Note that in the previous image, in the field marked in green, we have added the field “Bulk operations: User (User)”. This field is provided by the VBO module. Let's see the field configuration, in the drop-down menu “BULK OPERATIONS SETTINGS”:
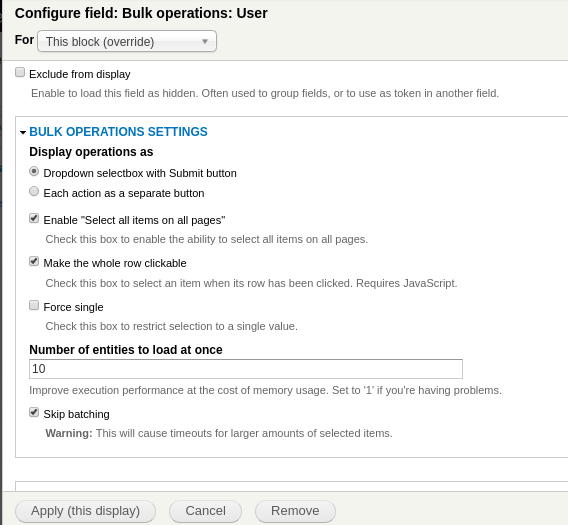
IMPORTANT NOTE: For this example, and taking into account that in the configuration of the first component we have indicated that it takes an argument from the URL, we must deactivate batch processing, since if we do not do so, once the process is executed we will be taken to a batch page, therefore losing the URL argument. This example applies to few results (no more than 30 users in a group), so batch processing is not required. If necessary, the structure of the main component must be re-considered.
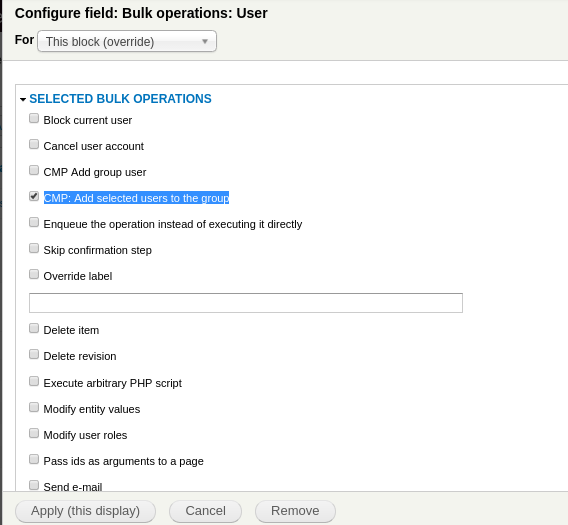
5. Next, in the “SELECTED BULK OPERATIONS” drop-down menu, we select the first component that we saw in this article:
6. We save the configuration of the field and the View. Now we only have to place the block (the same View that we just created) in the previously mentioned route. It will look similar to the following image:

7. When selecting and running the selected component, it will ask us for the second argument of the component (the roles in this case):

NOTE: In the tests carried out, the argument selector is presented as a textarea where the required values must be entered separated by commas. From a usability point of view it is not practical (who is going to know the ID's of X entities?). A simple way to mitigate this could be to place another block with the possible values, and using jQuery to fill them in the field. But it's just an option. Everyone can look for more options.
8. The confirmation window will then appear. We can omit this in the configuration of the field within the View:

we will see the successful execution message:
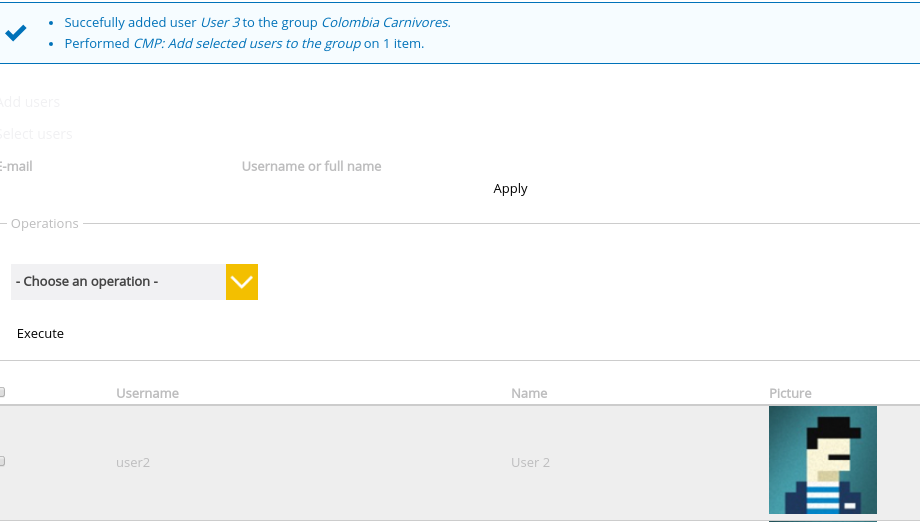
10. Observing in the group (for this case):

GENERAL NOTES:
- Module used for groups: Group ( https://www.drupal.org/project/group )
-
Set permissions for the View, or the page.
