
Currently one of the most critical factors taken into account by the different search engines when indexing websites is their loading speed, since a high loading time when visiting a website will offer a poor user experience. favorable, and possibly the visitor will give up his intention to continue browsing within it, which translates into losses not only economic but also in brand positioning.
One of the most common causes that affect latency time and make a website load very slowly is the weight of the images published on it, since sometimes content editors upload graphic pieces to their websites with very large sizes or with resolutions that are more suited to print destinations than to digital media.
To optimize the weight of images, today we can find a wide variety of online tools that help us in this work, but these tools have a great limitation, and that is finding the appropriate balance between visual quality of the graphic piece. in relation to its weight in kilobytes, that is, these tools do not detect at what degree of compression an image already looks pixelated to the human eye.
Drupal 8 currently has the GD2 toolkit for image manipulation, where you can set a percentage of jpeg quality, but although its performance is acceptable, it requires some help to do its job even better.
Next, as an example, we will optimize an image using Gimp , a free photo editing software under GPLv3 license compatible with Windows, MacOs and Linux. Gimp can be downloaded through its official website .
Once the program has been downloaded, and the installation process has been completed (which is quite simple, it does not require advanced knowledge) we will need to have two things ready, first the image that we are going to use, in this case the selected image is a file called beach. jpg that has a width of 6522 px by 4353 pixels high and a weight of 16 megabytes, which is too much for a website, and if we want to publish it we must optimize it; and secondly we must know the dimensions of the container that will host the image within the website, that is, if the "frame" that will contain the image within a page of the site is 1280px x 750px we must adjust the graphic piece at these dimensions to avoid wasting pixels.
Having already decided which image we are going to use and what dimensions we should scale it to, our next step will be to open the Gimp photo editor.
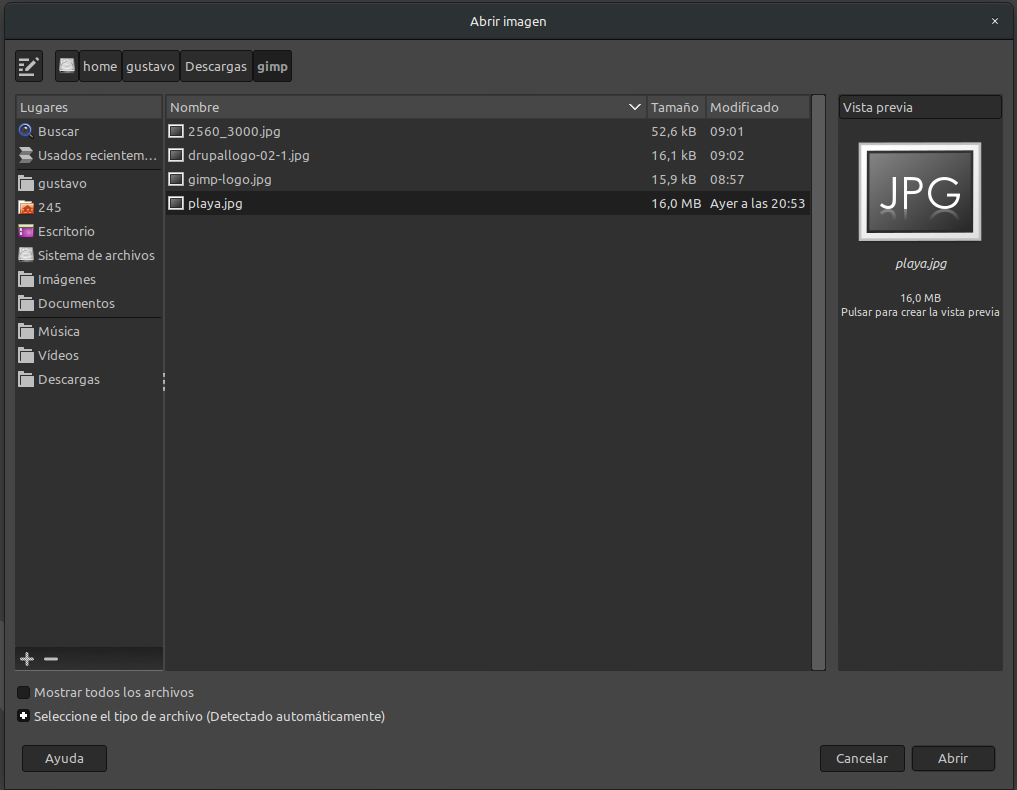
We enter File -> Open or use the key combination Control + O and select the image file, which in our case would be playa.jpg, then we click on the "Open" button.
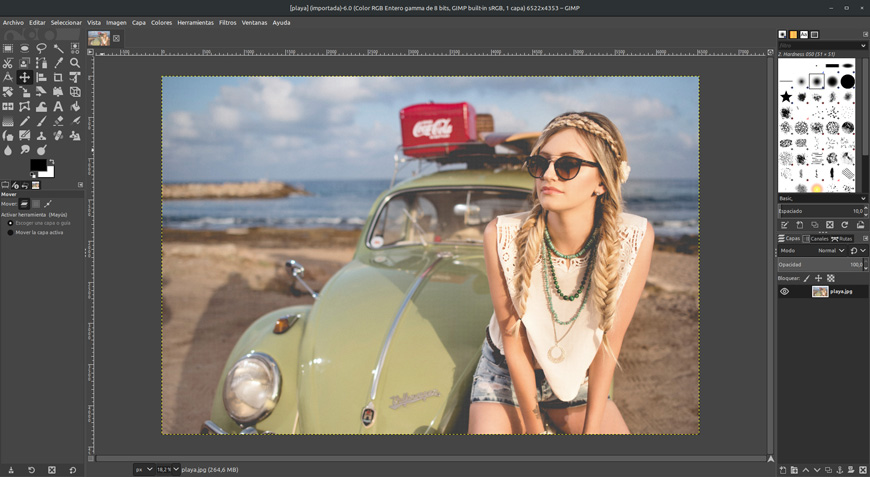
Once the file is open, the first thing we need to do is adjust its dimensions to those of the container or "frame" within the page where the image is going to be published. We will take as an example the dimensions mentioned above (1280 x 750 pixels), and since our example file "playa.jpg" has much larger width and height measurements (6522 x 4353 pixels), that is what we will adjust next.
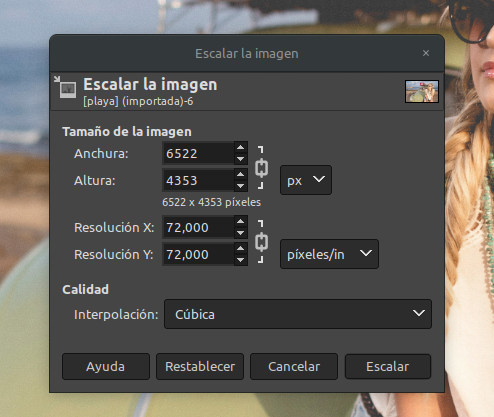
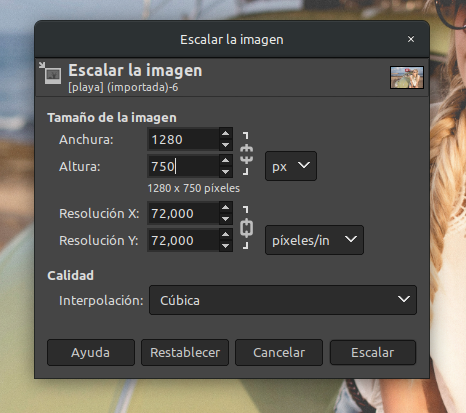
We go to the "Image" menu and click on the "Scale image..." option. A dialog box will appear in which we can see the current measurements of the image (6522 x 4353 pixels). We will adjust it to (1280 x 750 pixels). On the right side of the fields where the pixel measurements are defined, we will find an icon with the shape of a chain link. When it is closed, it indicates that it will maintain the proportions of the image. When it is open, we can modify the width and height measurements without worrying about affecting the proportion of the image. Next, we see the "Resolution x" and "Resolution y" options. These values should always be set to 72 pixels/in for both, since it is the optimal measurement of pixels per inch for the web. Higher values would apply if the image is intended for print media. Next, we click on the "Scale" button.
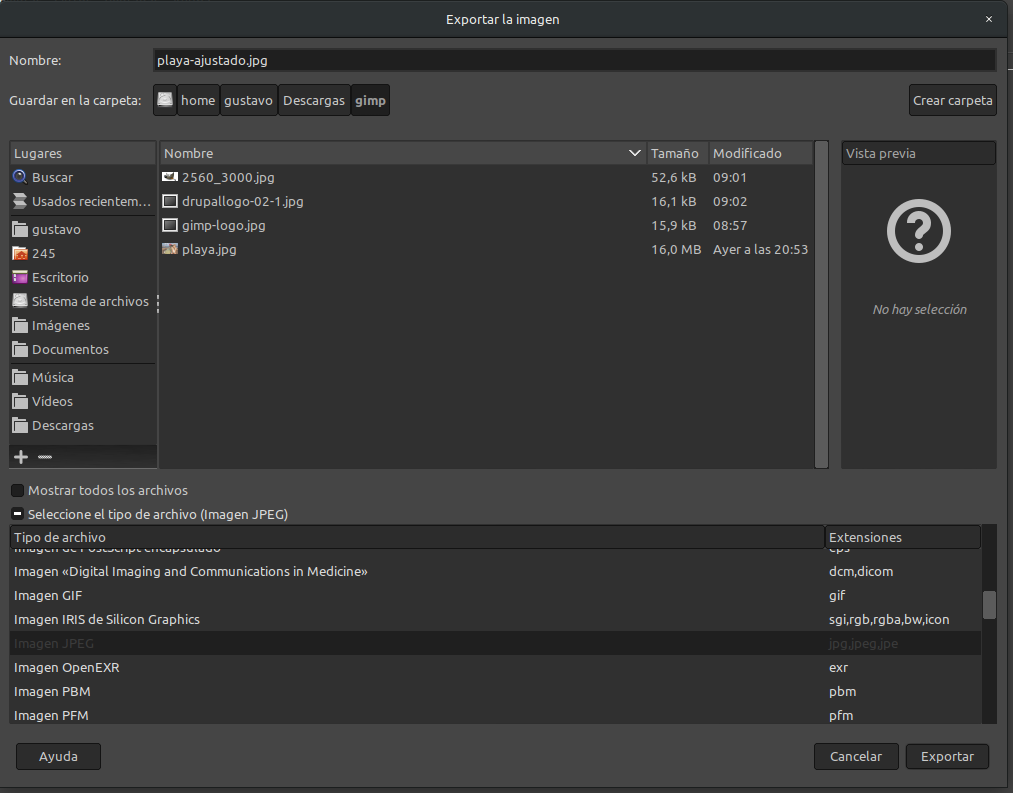
Once the image size is scaled, we proceed to adjust its compression, to do this we enter the "File" menu and click on the "Export as..." option, in the name field we assign a name to the new file to be generated, for this example we will name it beach-adjusted.jpg, in the "Save in folder:" field we select the location where the file will be exported; in the "Select file type" field located at the bottom of the dialog box, we display it and select "JPEG Image", if we need to export an image that has Alpha channels or transparencies we would select "PNG Image", then we click on the "Export" button.
A dialog box called "Export image as JPEG" will appear, in it we will select the option "Show preview in image window", in the layers panel located at the bottom right of the Gimp interface we will be able to observe that the image layer has been duplicated, and the new one has been named "JPEG Preview", we select it and move the dialog boxes to be able to see the interface canvas.
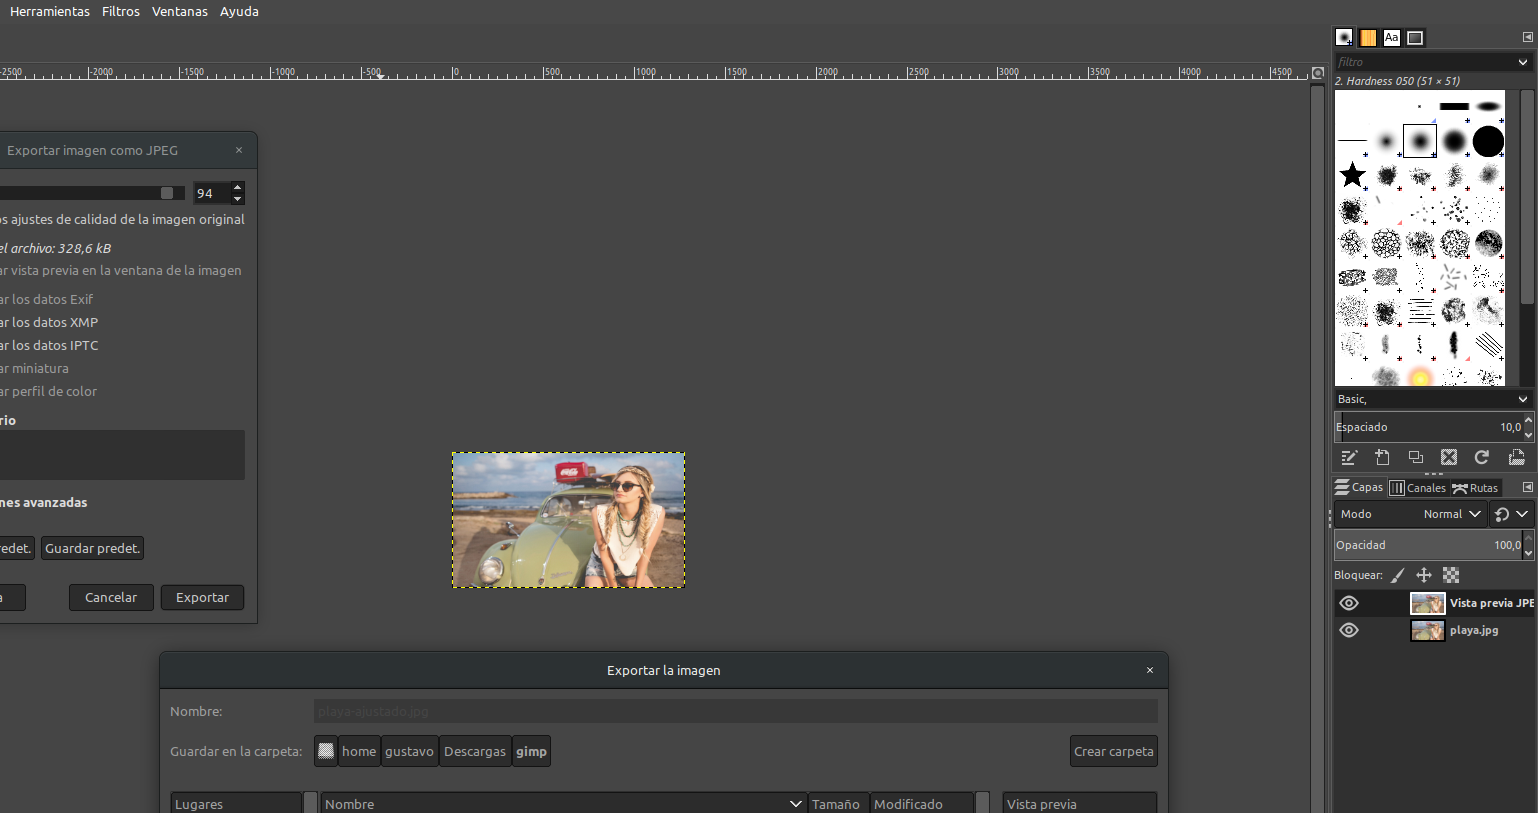
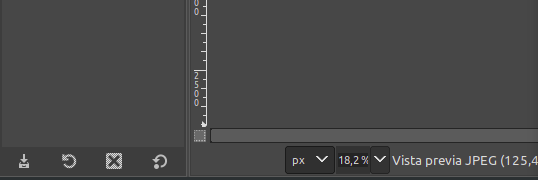
As the image appears too small in our interface to be able to notice the changes in the details, we increase the zoom through the drop-down menu located in the lower left part of the interface; for our example we will adjust it to 100%.
Now that we have a clear view of the image preview, in the "Export image as JPEG" dialog box, we move the "Quality" field to its minimum value, that is, 0, by dragging the button all the way to the left. At this point, we will see that the image looks totally pixelated and with very poor quality.
![]()
It is at this moment when we will begin to do that task in which online image compression tools have their limitation, and that is finding the appropriate balance between visual quality and image weight, to do this we will gradually move the quality button to the right, until we reach the point where we visually notice no difference in the quality of the image, in the first image the quality is at 6, in the second image the quality is at 12 and we see that it has improved a little but not enough to be able to publish it, we continue raising the quality little by little until we reach 35, which would be our ideal balance point between quality and compression, we can easily identify the ideal balance point because if we reduce it to 34 we will notice a slight loss of quality, but if we go from 35 to 36 visually there will be no visually perceptible changes.
![]()
![]()
![]()
Finally, we click on the "Export" button and in this way we have been able to optimize an image that originally weighed 16mb to a file that only weighs 58 kilobytes and without loss of quality.
